Tag Archives: Baking

That perfect brownie

18 Feb Perfect chocolate brownies with ice cream and chocolate sauce

After a few failed attempts, I’ve finally, finally found that perfect brownie recipe.  It isn’t just me that keeps making massive mistakes (I hope not anyway) but rather I just needed to find a recipe that suited my taste.  And I’ve found it.

Perfect chocolate brownies with ice cream and chocolate sauce
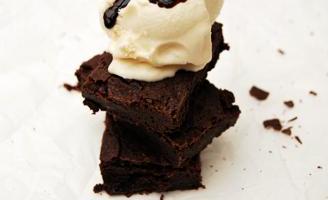
I’ve been posting regularly on my Food Wonders blog, and the successful brownie recipe has been proudly uploaded.  It’s so easy, only 5 ingredients: dark chocolate, unsalted butter, sugar, plain flour and eggs.

A good friend of mine pointed me in the right direction.  There is an amazing bakery here in London called the Hummingbird bakery.  They focus on American style baking and their red velvet cupcakes are to die for.  I actually never had their chocolate brownies before until now.

My husband’s absolutely favourite dessert is a warm fudgy chocolate brownie with hot chocolate sauce and vanilla ice cream.  He doesn’t really care much for cakes and in general baked goods, as I’ve mentioned before.  However, if a chocolate brownie is on the menu then he simply cannot resist!

As it was Valentine’s day last week, I decided that I must make this dessert and try, yet another brownie recipe.  I think I was just as excited about these brownies tasting so amazing as my husband.  Finally, no more searching is required!

Please check out this recipe on my Food wonders blog and sign up for the monthly newsletter!  Cheers.


A very special birthday cake

7 Feb

As I have a lot of time on my hands and a very dear friend of mine recently had a birthday, I thought it only appropriate to spend a few hours making a pretty amazing birthday cake.

This cake is the cake of all cakes.  I’m not going to lie – it took many hours to make and I’m not sure I’ll make this cake on my own again.  Doesn’t sound great, does it!  But the result was so great, that if you can share the burden with one other, then it is 100% worth it.

I found this recipe in a magazine and it’s 5 layers.  It is also unassuming, as the decoration looks pretty good, but you have no idea what’s in store for you until you cut into it and take a slice.

I knew that this cake was pretty special, when another friend visited the birthday girl after consuming a French 3 course meal (so it was rich and he must have been very full), and yet he ate a huge piece of cake with his hands.  We had reserved a slice and wrapped it in a napkin for him to take home, but he couldn’t resist and consumed it within seconds.  Greedy, yes, but satisfying to watch as the tired baker!

For layer 1: the base
130 gr melted butter
360 gr digestive biscuits / sweet biscuits
80 gr golden syrup
 
For layer 2: the popcorn peanut crunch
150 gr crunchy peanut butter
95 gr caramelised popcorn (UK: Butterkist)
40 gr Crunchie bar (honeycomb chocolate bar)
2 gr salt
100 gr dark chocolate (+70% cocoa)
150 ml double cream
 
For layer 3 & 5: chocolate cake
165 gr unsalted butter, room temperature
200 gr golden caster sugar
100 gr light muscovado sugar
3 eggs, room temperature
20 gr dark chocolate (+70% cocoa), broken into pieces
120 gr milk (not skinny)
20 gr golden syrup
175 gr plain flour
50 gr cocoa powder
6 gr baking powder
4 gr salt
 
For layer 4: 150 ml whipping cream (or single cream)
 
For the icing / frosting: 
180 gr caster sugar
120 ml double cream
120 gr unsalted butter, chopped
200 gr cream cheese (some extra, see comments below)
 
For the decorations: 100 gr caramelised popcorn
 
(whew!)
 

First is the cake (which I actually made the night before).

Preheat the oven to 180 C / 350 F.

Grease and line a 23cm springform tin with baking paper.  (I used a 21cm, as I don’t have a 23cm and discarded – into my mouth, I must confess – some of the excess mixture of each layer.  It seemed to work!  Although I did have a crazy sugar headache after assembling the cake)…

In a large bowl, using an electric mixer, mix the butter and sugar for a few minutes.  Add the eggs, one at a time.  Beat until light and fluffy.

Melt the chocolate in a bowl in the microwave (30 seconds, stir, 20 seconds, stir, etc…) with the milk and the golden syrup.  Make sure this mixture does not boil.  You want the chocolate just melted.

Slowly beat the flour, cocoa, baking powder and salt into the sugar and butter mixture in the bowl, until just mixed.  Add the chocolate mixture in and once combined, pour into the prepared tin and bake in the oven for 30 – 40 minutes – until a skewer pushed into the centre comes out clean.

Remove the outer ring and allow to cool on a wire rack.

As I made this the night before, I was able to use the same springform tin (as not every has two of the same shape).  Grease and line this tin again using the same method as above.

Now for the base.  In a food processor, whizz the biscuits to fine crumbs.

In a small pan, melt together the butter and golden syrup and then add to the crumbs.  Pour into the prepared tin and cover the base ensuring it’s even and flat and chill in the fridge for 1 hour.

For the second layer, whizz all ingredients, except the chocolate and cream, in the food processor until there are small crumbs.  Melt the chocolate and cream together in the microwave (as above) and mix in with just 200 gr of the popcorn mixture.

Spoon this over the biscuit base, nice and flat and return to the fridge.

For the icing / frosting, heat the sugar in a pan over a low heat with just a splash of water.  Do not stir this while it is melting and turning into caramel.  You can brush some of the sugar that is on the side of the pan down with a wet pastry brush, but do not stir until it has turned into a nice amber (caramel) colour.

Add the cream very carefully (as this will splatter), then the butter and a large pinch of salt, whisking to combine all ingredients.  Allow this to cool and then add the cream cheese.  With the above recipe, I found that I needed extra cream cheese to make it a thicker consistency, so I would look at doing the same, if need be.

Just before assembling the cake, roughly chop the popcorn you are using for the decoration and whip the layer 4 cream until thick.

To assemble, cut the top of the chocolate cake a little, so you have a flat top and bottom and then slice it in half horizontally.

Take the base and peanut crunch out of the tin and place on a serving plate.  Spread a thin layer of the caramel icing / frosting.  Place one slice of chocolate cake on top.  Spread the whipped cream over this slice of cake and then top with the second chocolate cake.

DSC_5565

Spread the remaining caramel icing / frosting over the top and sides of the cake.

Cover this with popcorn until the entire cake is covered.  As you may see with the picture below, I didn’t manage to cover the entire top of the cake.  This may or may not have something to do with the fact that I continued my sugar binge above with caramel popcorn and realised at the end that I didn’t have enough….  You decide.  Enjoy!

DSC_5568

Nutella cupcakes

14 Jan

I’ve travelled around the Great Barrier Reef, Melbourne, California and Germany – lucky me! – and now it’s back to my kitchen at home.  It’s amazing how much you miss homemade food after many weeks.  Eating out 3 times a day sounds like heaven, but always too much of a good thing is never great so after 2 months, I’m very happy to stay in for a while!

I’m sticking with the cupcakes theme and I may as well use one of my favourite things to come out of a jar – Nutella!  What doesn’t Nutella go well with (I can think of a few) but just ignore that for a moment and just think about the wonders of Nutella.  My personal favourite is just on a spoon and then straight into my mouth!  Mmm heaven.

Makes 12

125 gr unsalted butter at room temperature (don’t try to beat with cold cubes, like I did)
60 gr light brown sugar
50 gr runny honey
1/2 tablespoon coffee
2 tablespoons milk
60 gr Nutella (mmm Nutella)
2 large eggs
160 gr plain flour
40 gr cornflour
1 teaspoon baking powder
pinch salt
extra melted butter 
 
For the icing / frosting:
150 gr cream cheese (don’t bother with fat-free!)
150 gr Nutella (mmm Nutella)
350 gr icing sugar
1/2 tablespoon soft butter
 

Preheat your oven to 175 C (350 F).

Place 12 cupcake liners into a muffin tray and brush liners with melted butter.

In a large bowl, using an electric mixer, or upright mixer, mix the butter, sugar and honey until light and fluffy.  Should take about 3 minutes on a medium speed.  Add the coffee, milk and Nutella as the whisk on a low-speed.  Then add the eggs, one at a time.

In a separate bowl, sift together all the dry ingredients and then add to the other bowl.  Fold the mixture slowly until well combined. Divide among the cupcake liners and bake in the oven for approx 20 minutes.

For the icing / frosting, blend all the ingredients together.  Add a dash of milk if you need, but I didn’t.  Add to a piping bag and pipe using a medium nozzle.  I piped from the outside in, with the piping bag upright.  Enjoy!

nutella cupcakes

Cupcake decorations

8 Nov

Aside for a dollop of icing, I had no real experience of decorating a cupcake.  Be it buttercream, sugarcraft or ganache, in comparison, my cupcakes looked very, very ordinary.  Just thinking about sugarcraft scared the daylights out of me.  It was some foreign skill that would take me years to master.

After a day long decorating class, I’m happy to say that it isn’t as hard as the outcome looks.  It will still take me years to master, but a few basics make cupcakes look extra special, as the photo’s prove.

One thing I did learn about sugarcraft, however, is that the skill is in the moulds.  Whoever thought of and created each mould or cutter has all the skills, while the rest of us benefit from their imagination.  There are quite a few tools that you need to buy, just for a beginner, but they are all relatively inexpensive.

The tools we used were:

The food items we used were:

On top of a vanilla sponge cupcake with buttercream icing:

For the butterflies

Roll out your chosen colour of flower paste thinly.  You know that it’s thin enough when you hold up the paste with one finger.  If it drapes nicely over your finger, it’s the right thickness.  If it is still a bit stiff, you need to roll it out more.  If it’s too thin, your finger will rip a hole.

With your butterfly cutter, cut out a shape.  Lightly glue the surface with a brush and sprinkle on some edible glitter.  Dry the butterflies on some folded cardboard, so they dry to the desired shape.  They will need a couple of hours to dry before adding to the top of a cupcake.

For the daisies

As above, roll out the flower paste thinly.  Cut out the four different sizes of daisies.  Lay these on a celpad.

With the two smaller daisies, with the ball tool, push the centre slightly, so the petals curve upwards.  With the two larger daisies, use the bone tool and from the tip of each petal to the inside (avoiding the centre) gently push down, so that the petals curve upwards.  To layer these together, secure with a little edible glue.  Leave these to dry and attach with royal icing.

For the hydrangea

Similar to the daisies, roll out the flower paste and then cut out the various sizes.  Then using the mould, press these into the desired shape.  As they don’t sit flat, it’s best to dry them on top of crushed greaseproof paper.

Enjoy!

Mini Courgette Muffins

22 Oct

Courgette / zucchini is one of my favourite vegetables and I discovered this recipe online, while searching for courgette recipes (sad, I know).

They took about 10 minutes to prepare and tasted so good, I ate all 12 once they come out of the oven.  Thank god there were only mini, otherwise I would have really over done it (?!).  So my advice, is to ensure that there are at least 3 of you at home, so that you can only devour 4 each – much more civilised.

1 cup grated zucchini / courgette
1 egg
1/4 brown onion, diced
1/4 cup grated cheddar
1/4 cup breadcrumbs
salt and pepper
paprika
cooking spray
 

Pre heat the oven to 200 C / 400 F.

Spray the mini muffin tray with the cooking oil.

Press the grated zucchini / courgette with paper towel to remove the excess water.

Combine all the ingredients in a bowl.  Fill each muffin hole with the mixture.  Sprinkle on some paprika.

Bake for 15 min or until cooked.  Enjoy!


German meat and cabbage buns

8 Oct

I have a very soft spot for German baking, growing up on it, but I had never heard of “Beirocks” until I saw them being made on TV.  They do have very typical ingredients (meat, cabbage, carbs, fennel and caraway seeds), which is right up my alley, so I decided to give them a try.

They are a little time-consuming, as they have to rise twice, but aside from that they’re very easy to make (the filling can be made the day before) and they are an absolute crowd pleaser.  I made these for a group of friends and we consumed way too many each, sitting outside in the sun (so I obviously made these the first time a few weeks ago, now that the weather has turned!) drinking beer.  They aren’t called Beirocks for nothing.

The men of the group were particularly taken by them and my fiance has requested them again, on more than one occasion.   I even overheard him telling his mates how great they were – which is a true sign of a great recipe discovery!

Makes 20

Filling:
2 tablespoons oil
500 gr minced beef
2 onions, finely chopped
1 small white cabbage, shredded finely (discard the hard core)
1 tablespoon salt
1/2 tablespoon white pepper
1 teaspoon black pepper
1 tablespoon caraway seeds
1 teaspoon cumin seeds
1 teaspoon fennel seeds
1 teaspoon ground cumin
100 ml water
50 gr melted butter
 
Buns:
1 tablespoon caster sugar
300 ml warm water
1 x 7 gr sachet of dried yeast
500 gr strong white flour, extra for dusting
1 teaspoon salt
1 tablespoon sunflower oil
 

I made the filling first.  This can be done the day before – which is more convenient, as the filling is then cold when you want to assemble the buns.

Heat the oil in a frying pan (that has a lid) and brown the beef and onions over a medium heat, uncovered.  Make sure that the beef doesn’t stick together in large clumps.  Add the cabbage and all the spices.  Fry for another 5 minutes.  Add the water and cover with the lid.  Simmer for 5 minutes or more – until the cabbage is cooked through and very soft.  Remove from the heat and leave to cool.

To make the buns, stir the sugar and warm water into a small bowl.  Sprinkle over the yeast and stir lightly with a wooden spoon (not a metal spoon).  Leave for 10 minutes – this will foam on the surface.  In a large bowl, mix the flour and salt together.  Make a well in the middle.  Pour in the oil and yeast mixture.  Mix together with a wooden spoon and then your hands.  Knead this dough for 10 minutes until smooth.  Oil the mixing bowl, add the dough, cover with cling film and leave to rise in a warm place for 30-45 minutes.

Pour the dough back onto the work bench and divide it into 20 even balls.

Line 2 large baking trays with good quality non-stick baking paper, or with a lot of oil.  I found that the paper stuck to the bottom of the buns and if I greased the trays very well, I could remove the buns from the tray with an egg flip.  Turn the oven on to 180 C / 350 F.

Roll out the dough balls into large rounds – roughly the size of a saucer.  Place 2 tablespoons of the cold filling in the centre.  Brush the edges with water and then bring the edges of the dough to the centre and pinch together.  Place on the baking tray with the sealed edges at the bottom.  Leave to rise for another 20 minutes.

Bake in the preheated oven for about 20 minutes, or until golden brown.  Brush with melted butter and serve with German mustard, pickles and beer.  Enjoy!

served outside with beer


Sweet shortcrust pastry

16 Jul

After last weeks successful pastry, I thought I would make another one, just to test that last week wasn’t a fluke!  I had a few friends coming over for dinner and decided to make a chocolate and raspberry tart for dessert.

Thankfully, I managed to create another successful pastry – same process, but slightly different ingredients to make the pastry suitable for a sweet dessert.  As berries are in season, this worked a treat!

If I were to make this again, I would probably mix some milk chocolate into the ganache, as the dark chocolate was incredibly rich.

Pastry:
250 gr plain flour
100 gr cold unsalted butter, cubed
100 gr icing / confectioners sugar
pinch of salt
2 eggs, lightly beaten
 
250 gr raspberries
10 gr mint leaves, finely chopped
 
Ganache:
250 ml whipping cream
200 gr dark chocolate (perhaps 50 gr could be milk instead)
25 gr liquid glucose
50 gr unsalted butter, cubed
 

Serves 8

In a food processor, pulse the flour and butter until mixture looks like breadcrumbs.  Pour on a work surface and mix in the salt and icing sugar.

Make a well in the middle and mix in the eggs until you have a dough.  Wrap in cling film and refrigerate for 30 minutes.

Bring the pastry back to room temperature and roll out to fit a 20cm flan ring.  Refrigerate again for 20 minutes in the tin.  Preheat the oven to 190 C / 375 F.

Blind bake the pastry for 20 minutes, remove the beans / rice, reduce the temperature to 180 C / 350 F and bake for another 5 minutes or until the base is dry.  Cool the pastry on a wire rack.

Set aside 3 raspberries per person (24 if you’re serving 8) and halve the rest.  Mix in the mint.  Spread this evenly on the bottom of the cold pastry case.

For the ganache, heat the cream until just before it boils, take off the heat and add the glucose and chocolate and whisk until the chocolate has melted.  Slowly add the butter, whisking continually.

Pour this mixture over the raspberries.  Allow to cool and then refrigerate until very cold, approximately 2 hours.

Serve with the reserved raspberries.  Enjoy!


Quiche Lorraine

8 Jul


Finally, finally, I have conquered the shortcrust pastry!  This is one of my most exciting posts as it took me more than one attempt to get this right.  It’s always so easy to buy pre-prepared pastry at the supermarket, but I really wanted to create it from scratch.

I’ve never had homemade Quiche Lorraine, it’s always been bought from a patisserie and I’m sad to say, I’ve even bought one from a supermarket as well.  I will never, ever do that again.  The supermarket version, like many things, is so bland in comparison.   The homemade version was so silky and the filling was almost like custard, it was so tasty.

I was so chuffed with how this turned out that I did go on about it a bit only to be crushed by my fiancé letting me know that he isn’t the biggest quiche fan, but then after trying he did have seconds….

SHORTCRUST PASTRY / PÂTE BRISÉE
250 gr plain flour
125 gr cold unsalted butter, cubed
1 teaspoon salt
1 egg, lightly beaten
1 tablespoon cold milk
 
FILLING
150 gr cubed bacon
3 eggs
300 ml double cream
pinch nutmeg
pinch salt & pepper
50 gr grated Gruyère cheese (optional, this is not traditional)
 

To make the pastry, pulse the flour and butter in a processor until it looks like breadcrumbs.

Pour onto a very large board (marble if possible).  Sprinkle over the salt.  Make a well and add the eggs and milk in the middle.  Very gently mix together to form a dough.  Knead 5 times only.

Wrap in cling film and refrigerate for 30 minutes (can be overnight).

Take the dough out of the fridge and leave it to warm to room temperature (approx 30 min).  Otherwise when rolling the dough will crack.

Turn the oven to 190 C / 375 F.

Roll out to the dough and roll up on the rolling pin and roll out on the quiche tin (23cm tin, or you can make individual quiche).  Prick the bottom with a fork.  Chill in the fridge for 20 minutes so it doesn’t shrink while cooking.

Blind bake the pastry in the oven for 15 minutes, take the beads out and bake at 170 C / 335 F for a further 5 min or until the base is dry.

Fry the bacon for 5 minutes.

In a large bowl mix the eggs, cream, nutmeg, salt and pepper.

In the cooked pastry case, spread the bacon over the base.  Sprinkle over the grated cheese if using.  Then fill to the brim the egg mixture.

Bake for 15 minutes.  Can be served warm or cold.  Enjoy!

Easy Salmon bake

1 Jul

I’m sticking with the savoury dishes for a while and this one is very easy – if you stick with shop bought puff pastry that is.  Making pastry from scratch is high on my list of things to do, but I’m just procrastinating.  I think because my first attempt failed – which shouldn’t be a surprise, and I just need to shake that one-off and try, try again.

This salmon dish would be great for a small dinner party (the recipe below serves 4), as you can prepare the whole dish well beforehand and then just bake when needed.

85 gr watercress, chopped very finely
115 gr cream cheese
600 gr skinless salmon (very easy to slice the skin off), cut into two even pieces
250 gr puff pastry
salt and pepper
plain flour to dust work surface
milk for glazing 

Preheat the oven to 200 C / 400 F.

In a small bowl, mix the watercress, cream cheese, salt and pepper.

Roll the pastry out to approx 3mm / 1/8 inch thick.  It should be very roughly 8cm / 3 inches longer than one of the salmon pieces and more than twice as wide.  Trim any excess and keep aside for decoration (optional).

Place one piece of salmon in the middle of the pastry.  Cover with the watercress mix.  Top the other salmon piece on top.  Brush the pastry with water and fold the end pieces up and then the side pieces over the entire contents, making sure they overlap.  Press together to make sure it is well sealed.

Brush the pastry with milk.  Top with decoration from the excess pastry if you want and then brush this again with milk.

Make 2 holes with a skewer to allow the steam out.

Bake for 30 minutes or until the pastry is golden brown.

Test by pushing a skewer all the way in, hold for 5 seconds and then test if the skewer feels hot.

Remove from the oven, leave for a few minutes and slice to serve with salad.  Enjoy!

Homemade sausage rolls

9 Jun

It’s been a while since my last post.  I’ve been travelling for work. weekends away and celebrating.  So this is the first week that I have had time to do any baking for a few weeks!  As we had the Queen’s Diamond Jubilee here in the UK, with many street parties, I thought that I would join into the spirit of things and bake some sausage rolls.  Everyone loves sausage rolls, even the Duchess of Cornwall recently commented that she was a big fan.

My mother used to make them for our parties as children and there were never any leftover.  I found a recipe to use, but I changed it slightly to be similar to what we used to get as children.

My partner ate about 5 when he got home for work.  After he had finished, he asked where I bought them, as he thought they were amazing.  He nearly fell over when I told him that I actually baked them.  I had to show him the used oven tray to prove it.  So they were quite a hit.

250 gr puff pastry (I just used shop bought)
450 gr pork sausage meat (I squeezed the sausage meat from 6 sausage skins)
225 gr beef mince
1 small onion, finely chopped
1 tablespoon thyme
1 tablespoon grated lemon zest
1 teaspoon dijon mustard
1 egg yolk
salt and pepper
milk for glazing
 

Preheat the oven to 200 C / 400 F.

Line the baking tray with greaseproof paper and grease with some butter / oil and then chill.

Cut the pastry in half, lengthways.  Roll each to approx a 30 x 15cm / 12 x 6in.  Cover with clingfilm and chill.

In a large bowl mix all of the other ingredients (exclude the milk).  Divide the sausage mix into two.

Lay the chilled pastry out on the clingfilm or floured surface.  Roll the sausage mix into long tubes and lay in the centre of each piece of pastry.

Brush the pastry with the milk.  Fold the pastry over the sausage mix.

Cut the long sausage rolls into 12 pieces.  I found dipping the sharp knife in water in between each cut, made it a lot easier.

Put each sausage roll onto the pre-prepared oven tray.  Make two small cuts on the top of each roll and then brush with the milk.

Bake in the pre-heated oven for 10 minutes, or until the pastry is golden brown.  Cool on a wire rack.  Eat with tomato or chilli sauce.  Enjoy!